by Melanie

Simple BBQ Menu

May 12, 2014 in Kitchen, Mailbox by Melanie

Welcome to Day #1 of Kick Off to Summer Week, a multi-blogger event co-hosted by Lauren of From Gate to Plate and Summer of Summer Scraps.

With summer quickly approaching and Memorial Day in a few weeks, we want to make sure you have plenty of ideas for your Memorial Day activities. Each day we will be serving up a variety of different appetizers, main dishes, desserts, decor, printables and more – all centered around the up-coming Memorial Day. We hope you enjoy all of these wonderful ideas.

Tune in each day starting with Monday, May 12 and ending on Saturday, May 17. We have great prizes up for grabs throughout the week so you will not want to miss out on any of the days! Follow #KickOffToSummerWeek2014 on Twitter to keep up to date with all of our spectacular ideas and giveaways!

simple-bbq-menu


I am so excited to be participating in this fun event, and can’t wait to share a fabulous and simple BBQ menu with you – GREAT for your Memorial Day or Summer BBQs. It will look a little something like this:

Monday
Main dish • Easiest Ever Grilled Chicken marinade

Tuesday
Veggie Side Dish • Creamy Corn Salad

Wednesday
Fruit Side Dish • PB & Y Fruit Dip

Thursday
Salad • Six Simple Pasta Salads

Friday
Drink • Perfect Fresh Lemonade

Saturday
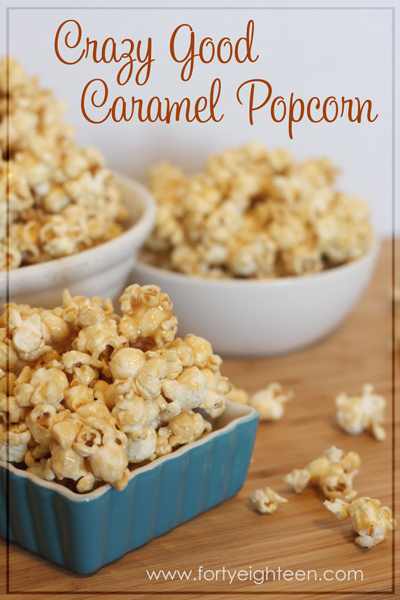
Dessert • Favorite Popcorn Balls


Yum! Let’s jump right in and get started with the Easiest EVER Grilled Chicken marinade.

This is so easy, I’m not even sure it actually counts as a recipe. But easy is what we’re going for, right? And it’s oh so tasty.

You only need 2 ingredients and some chicken. Are you ready for the secret? Here goes…

Ta da!

It only takes 2 ingredients to make the easiest ever #grilled #chicken #marinade. Simple and delicious? That's exactly what I need!


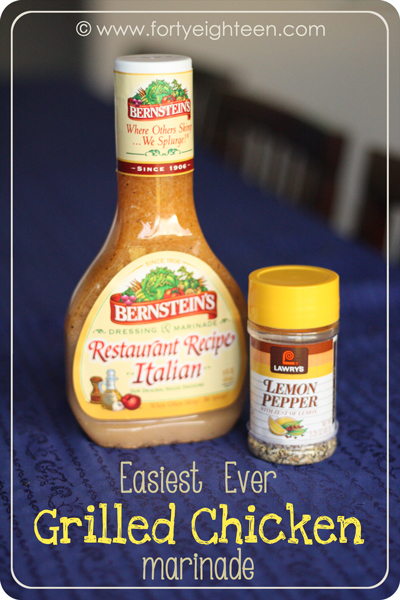
Italian dressing and lemon pepper. That’s it! Here’s what you do: Sprinkle your chicken with lemon pepper then put it in a Ziploc bag. Pour a bottle of Italian dressing over the chicken, seal the bag, and put it in the fridge to marinate. A few hours later – or the next day – take out your chicken and grill it. That’s it! Easy and delicious!! You can use *any* Italian dressing. I have used regular, zesty, light… and even this fancy “restaurant recipe,” all with great results. View all of the other Kick Off to Summer Week 2014 participants for more Memorial Day ideas!

Margarita Grilled Shrimp Skewers by From Gate to Plate
Cherry Limeade by Summer Scraps
Turkey and Grilled Pineapple Burger by Keep it Simple, Sweetie
Place of Honor by Lil Huckleberries
Edible Patio Table Centerpiece by Bits of Ivory
Easiest Ever Grilled Chicken by Forty Eighteen
Ranch Burgers by Lady Behind the Curtain
Strawberry and Candied Almond Spinach Salad by We Like to Learn as We Go
BBQ Banner Printable by My Daylights
Red White and Blue Fruit Pizza by Like Mother Like Daughter
Star-Spangled Muffins by Food Lust People Love
German Potato Salad by Denise Designed

Not only do we have fabulous recipes and ideas for you, but we also have giveaways with awesome prizes!

Our sponsor for Day 1 of Kick Off to Summer Week 2014 belongs to Pick Your Plum! We are so excited they joined us today. Pick Your Plum is an amazing deal site that features products from all over the world. New deals occur each morning at 7:00 AM Mountain Time. Some of these fab deals go so fast you might miss out on them because the deals are always so great!

pyp1

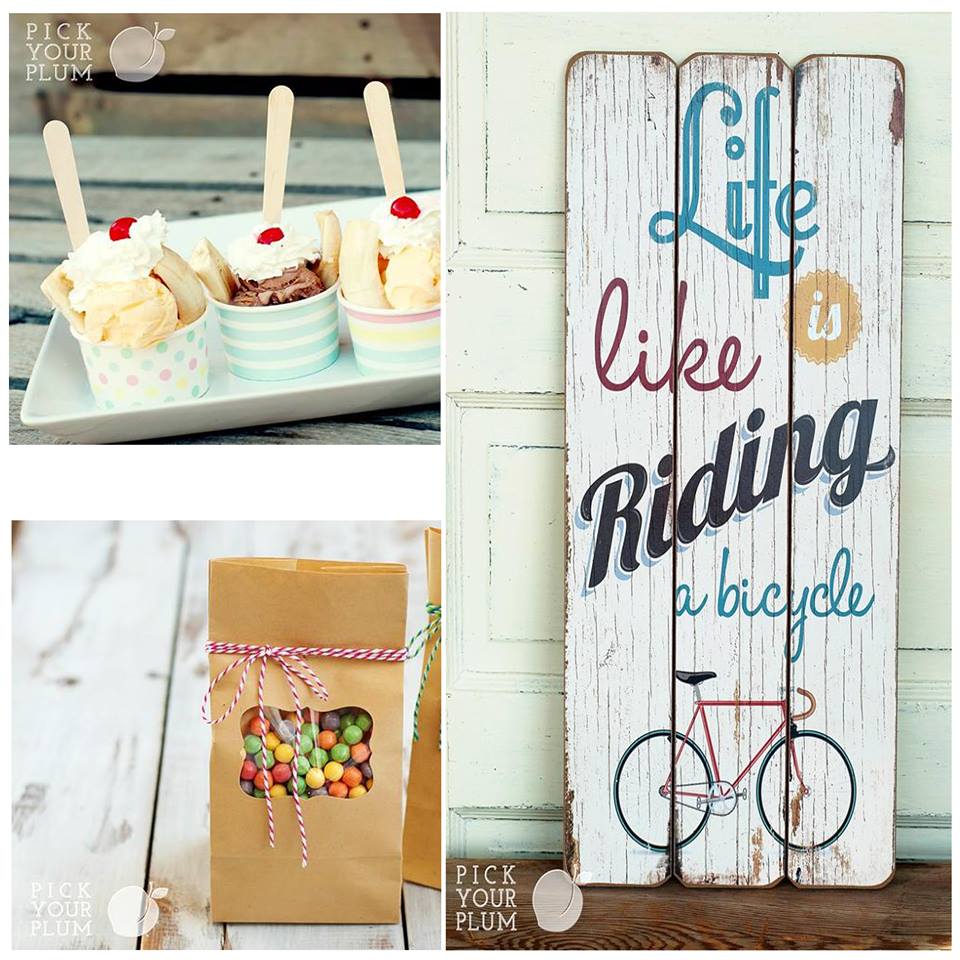
Pick Your Plum features clothing, home decor, crafting, party supplies and other fun surprises! You can follow Pick Your Plum on Facebook, Pinterest, Instagram, and Twitter.

pyp2

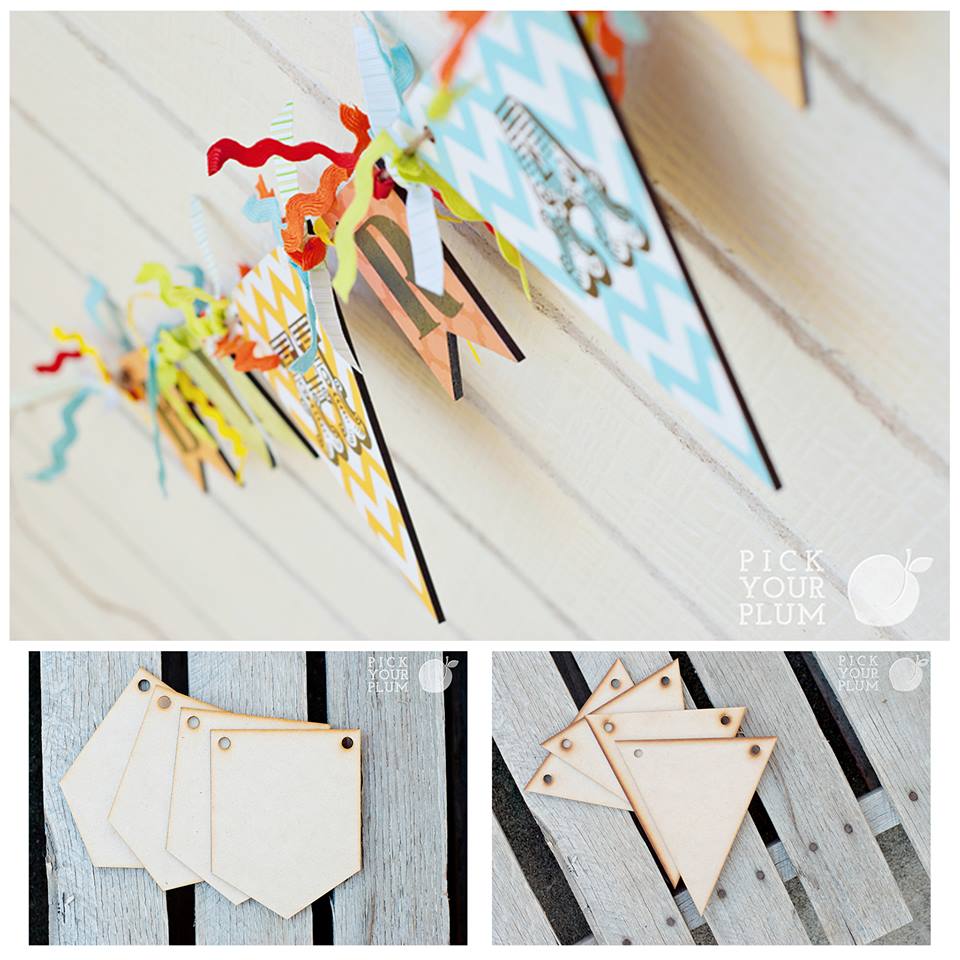
Today’s Pick Your Plum Prize Pack includes TWO $50 Plum boxes full of PYP awesomeness! (Seriously wish I could enter in this too because this prize is totally awesome!)

**Giveaway is open to US Residents only. Winner must be 18 years or age or older. No cash value available.**

**Disclaimer: This giveaway is being sponsored by Pick Your Plum. #KickOffToSummerWeek2014 bloggers have not received product or been compensated as part of this giveaway**

a Rafflecopter giveaway

So much awesome in one post! Be sure to come back every day this week to get the complete BBQ menu and for more fabulous ideas and prizes.

Do you have any Memorial Day plans?

by Melanie

Simply Ninja Salsa

May 2, 2014 in Kitchen by Melanie

Salsa is a breakfast food, right?

I mean, it could be. It MUST be a healthy choice — it’s completely made up of vegetables, fruit (if you’re in the “tomato is a fruit” camp), and herbs! Yep, definitely healthy. But do you have to serve this healthy salsa over eggs for it to be a welcome guest at the breakfast table?

I sure hope not. At this very moment I am enjoying the shovel-like qualities of my favorite tortilla chips as I use them to transport salsa from the bowl to my mouth as quickly as possible. And believe  me — if salsa for breakfast is wrong, I don’t want to be right.

"You have ninja cooking skills, MOM" is what my kids say when I make this salsa.


I may have already mentioned that I am a bit of a salsa snob. I am from Arizona, after all, where Mexican food is just the food we eat every day. There used to be this fabulous Arizona brand salsa at ONE grocery store in my hometown, but when it disappeared I couldn’t find another bottle of salsa to take its place in my mouth, er, heart. That’s when the search for the perfect homemade salsa began, and I have FOUND the golden ticket, my friends!

"You have ninja cooking skills, MOM" is what my kids say when I make this salsa.

looks just like me… I definitely need more healthy salsa. Put down the chocolate, Melanie.

In my family, we lovingly call this “Suzie Salsa” because my dear cousin, Suzie, is the one who introduced us to this recipe. Of course, I am incapable of leaving a recipe alone, so I have tweaked it a bit. Still, Suzie may be my very favorite cousin now because she completely changed my life.

Ridiculous, you say? No, it’s true. Salsa really can change your life. It can make you the most popular girl at the party (“Who made this salsa? It’s amazing!!!”) and the coolest mom your kids have ever known (“Suzie Salsa??? YESSSSS!!!”). Not only that, but my kids tell me I have “Ninja cooking skills” when I serve this salsa. Being compared to a ninja is the highest form of praise in this house.

All I’m saying is… this salsa can turn you into a Ninja! That’s some amazing salsa. "You have ninja cooking skills, MOM" is what my kids say when I make this salsa. Now after all of this build-up, you’re probably thinking no salsa could live up to the hype. Or this salsa must be so tricky to make that you could never succeed. Oh no, this is not the case at all. I really do get asked for the recipe everywhere I bring it, and it is SOOO simple to make you will almost be embarrassed to share the recipe when asked. But you still should, because it’s not nice to know the secret to ninja salsa and not share it. "You have ninja cooking skills, MOM" is what my kids say when I make this salsa.

Simply Ninja Salsa

  • 2 cans (16 oz each) diced tomatoes – you want the liquid, so don’t drain them
  • 1 bunch green onions – use all of the white and most of the green
  • 1/2 c chopped cilantro – I buy cilantro by the bunch and then toss about half of the bunch in there
  • 1 tsp salt – don’t leave this out!
  • 2 cloves minced garlic – if they’re small, I use 3
  • 2 Tb diced jalapenos – or as much as you want for your desired level of “hotness,” these can be canned or fresh

Toss everything in the food processor (I LOVE my food processor) and pulse a few times until it’s as thick and chunky or as smooth as you want it. That’s it!

"You have ninja cooking skills, MOM" is what my kids say when I make this salsa.


If you like your salsa hot and spicy, go ahead and toss some more jalapeno in there. My family likes everything mild (wimps!), so I sick to the 2 Tb, or even a bit less sometimes. Whatever your level of heat, it’s delicious.

Not just delicious…. Ninja delicious.

I think I need to make a few of these. Think it will catch on?

"You have ninja cooking skills, MOM" is what my kids say when I make this salsa.

Do you have a favorite salsa?

Disclaimer: This post contains affiliate links. I was not compensated for this post. All opinions are my own.

by Melanie

Sunday Chicken Supper

April 9, 2014 in Kitchen by Melanie

There’s just something about a Sunday that makes me want comfort food. Maybe it’s because growing up I remember two typical Sunday meals: Mom’s crock pot roast and Dad’s mac & cheese. Talk about comfort food… yum!

I still love a Sunday roast, and homemade mac ‘n’ cheese is my go-to comfort food, but I have also added a few new favorite meals to our Sunday evenings.

Sunday Chicken Supper is such a great Sunday meal! For one, it actually announces itself as the perfect Sunday meal right in its name. Can’t go wrong there! And doesn’t “supper” just sound more homey than dinner?

Besides that, it’s simple to throw together, takes minimal effort, and tastes delicious.

Crock Pot Chicken comfort food with veggies and bacon = the PERFECT Sunday meal


Sunday Chicken Supper

  • 4 medium carrots, cut into 2-inch pieces
  • 1 medium onion, chopped
  • 1 celery rib, cut into 2-inch pieces
  • 2 c fresh green beans, cut into 2-inch pieces
  • 2 small red potatoes, quartered
  • 1 broiler/fryer chicken (3 to 3-1/2 pounds), cut up
  • 4 bacon strips, cooked and crumbled
  • 1 1/2 c hot water
  • 2 tsp chicken bouillon granules
  • 1 tsp salt
  • 1/2 tsp dried thyme
  • 1/2 tsp dried basil
  • Pinch pepper

In a slow cooker (5 or 6 quart is a good size for this recipe), layer the carrots, onion, celery, green beans, potatoes, chicken pieces, and bacon. If you don’t want to cut up a whole chicken, you can use pieces already cut up – like thighs or breasts – but meat really has a great flavor when it’s cooked with the bones.

In a separate bowl, combine the water, bouillon, salt, thyme, basil, and pepper. Mix it up and then add it to the crock pot. Don’t stir it; just pour it over the top. Cover and cook it on low for 6-8 hours or until the veggies are tender and chicken juices run clear. When it’s done, set the chicken and veggies on a platter to serve, and then you can thicken the juices to use as a gravy.

My family happily gobbles this down every time I serve it, and I love that it’s pretty healthy! (The bacon is more of a condiment… like an herb for seasoning.) Of course, it’s great on a weekday, too.

Crock Pot Chicken comfort food with veggies and bacon = the PERFECT Sunday meal


What do you love to eat on a Sunday?

by Melanie

Knock, knock! Who’s there? Banana Bread!

April 4, 2014 in Kitchen by Melanie

Best Ever Banana Bread from Forty Eighteen


What is it with my family and bananas? When I buy them with a plan in mind, like a specific recipe or meal, they’re inhaled before I have the groceries put away. When I buy them just because they’re healthy and I think my family would enjoy eating them, they sit on the counter until they’re covered in brown spots and make everything around them smell like rotten banana.

Luckily, overripe bananas are perfect for baking, and I have the yummiest banana bread recipe ever. Of course, as soon as we’re down to two bananas that hang out and turn brown, Steve eats one of them out of a sense of duty and foils my plans. His upbringing of never wasting food no matter what doesn’t mesh well with my upbringing of always using the overripe bananas for banana bread.

This morning I found two brown bananas sitting on my counter, so I went into stealth mode and hid them away before Steve could add them to his cereal that tastes like cardboard. When Chuck got home, we rescued the bananas from their hiding spot and happily mashed away.

I love, love banana bread, and this is a fabulous recipe. I love big chunks of nuts, and I never measure how much I actually put in. I make small loaves, mini loaves, muffins, mini muffins… lots of shapes and sizes of this moist and delicious yumminess. Cooking times vary with size, so you’ll want to watch it so you don’t end up with banana nut charcoal

Best Ever Banana Bread from Forty Eighteen


Banana Bread

  • 3 eggs
  • 1 c oil
  • 1½ c sugar
  • 2 c flour
  • 1 tsp vanilla
  • 1 tsp baking soda
  • 1 tsp nutmeg
  • 1 tsp salt
  • 1 tsp cinnamon
  • 1 c ripe bananas (about 2-4 depending on size), mashed
  • 1 c milk
  • 1 c walnuts (or more, if you’re like me and just want the bread to hold the nuts together), coarsely chopped

Mix the dry ingredients, then mix the wet ingredients, then combine them until well blended. Pour into your baking pans and bake at 375.

In a full-size loaf pan, bake for 45 minutes or until toothpick inserted in the center comes out clean. Muffins and mini loaves take 15-30 minutes, just keep an eye on them.

My sister couldn’t believe how HUGE my slices of banana bread are in this photo. I didn’t know what she meant until I realized she thought those were full-size loaves. These are just mini loaves, but now I totally want to make a full-size loaf and slice it super thick because that sounds a-maz-ing.

By the way, that knock knock joke about bananas? Chuck’s favorite joke.

Knock, knock! Who’s there? Banana. Banana who?
Knock, knock! Who’s there? Orange. Orange who?
Orange you glad I didn’t say banana??? hahahahaha!

Number of times she told it while we were making banana bread? 11.

Sorry you missed it? Yep.

What do you do with your overripe bananas?

by Melanie

Sausage and Potato Pie

March 27, 2014 in Kitchen by Melanie

You guys! You are going to thank me for this recipe. Seriously, it’s soooooo good.

My kids always get a little nervous when I pull out the pie plates because they think they don’t like pie. It’s true we’re not big fruit pie fans around here, but they love EVERY savory pie I have ever made.

I didn’t even scare them with the pie plate this time (because I am in serious need of a deep dish pie plate), but as soon as they heard “pie” in the name, they were just as scared. Mwahahaha! They kept asking me what I was making for dinner like the answer would change. “Maybe this time I ask, dinner won’t be pie!” Silly kids.

My kids thought they didn't like pie until they tasted this. Oh my goodness, so delicious! Sausage and Potato Pie from Forty Eighteen


This Sausage and Potato Pie has a lot going for it. The Italian sausage and red peppers make it taste like a gourmet pizza. The zucchini makes you feel like you’ve had your veggies for the day. And the potato crust keeps it gluten free. Win, win, win!

Plus, it’s pretty.

Sausage and Potato Pie

  • 2 lb olive oil
  • 1 large sweet red pepper – cored, seeded, and cut into strips 1/4″ wide
  • 1 medium-size zucchini, thinly sliced
  • 2 tsp minced garlic
  • 1/2 tsp black pepper
  • 1/4 c minced fresh basil OR 1/4 c minced flat-leaf parsley mixed with 2 tsp crumbled dried basil
  • 1 lb sweet Italian sausage, casings removed, or diced kielbasa or ham
  • 3 large potatoes, peeled and very thinly sliced
  • 1 c grated Parmesan cheese
  • 2 c shredded mozzarella, Monterey Jack, fontina, or cheddar cheese

Start by making the filling. Heat 1 Tb of oil in a skillet. Add the red pepper and zucchini and saute, stirring occasionally, for about 5 minutes. Then add the garlic, pepper, and basil and saute another few minutes. Add the sausage and cook until browned and you have no pink left. No one wants to eat raw sausage.

Remove your skillet from the heat and set it aside while you slice your potatoes. Make sure they’re thin or they won’t cook through. No one wants to eat raw potatoes either. Toss the potatoes with the other 1 Tb of oil.

If your cheese isn’t grated yet, this would be the time to do it.

Now it’s time to start assembling your pie. I use an oval 3-quart casserole dish, but a deep-dish pie plate should work great, too. Just don’t try to fit it all in a standard pie plate or you’ll be sorry. Unless you want an extra excuse to clean your oven – in which case, definitely opt for the smaller dish.

Make sure you spray some non-stick cooking spray in there so you can get the food out when it’s time.

Layer 1/4 of the potatoes in your dish, overlapping slightly. Spread 1/3 of the sausage mixture on top of that and then 1/3 of the cheeses. Spread another layer of potatoes and then press the layers down slightly.

Repeat those layers again, starting with the sausage, and then again, pressing down each layer and finishing with a top layer of potatoes. (I had to slice another potato because I misjudged how much I needed on each layer.)

Cover it with foil, toss it in the oven, and bake at 425 for 40 minutes. Then remove the foil and bake another 5-10 minutes more until the potatoes are crisp and cooked through.

When you remove it from the oven, let it stand for 10 minutes at room temperature. If you have a lot of fat swimming around (I didn’t), pour it off and then you’re ready to serve.

My kids thought they didn't like pie until they tasted this. Oh my goodness, so delicious! Sausage and Potato Pie from Forty Eighteen


My kiddos inhaled their first servings and then asked for more. They still think they are afraid of pie, but I’m one delicious meal closer to convincing them that’s simply not true.

My kids thought they didn't like pie until they tasted this. Oh my goodness, so delicious! Sausage and Potato Pie from Forty Eighteen


Today is the last day to enter to win a family photo session from Laura Hawkins Photography. If you’re a Utah local, be sure to enter! (Click on the image for more info and to enter.)

Enter to win a family photo session from Laura Hawkins Photography in Utah.

  What is your favorite pie? Do you prefer sweet or savory?

Related Posts Plugin for WordPress, Blogger...